

I am a cheapskate (most of the time). I don’t want to spend any more money than I need to. I used to host my resume website on WordPress (basic plan costs $5/month), but I was always looking for ways to save. I had never given much thought on VPS, because I assumed they would be more expensive and difficult to manage. But then I took on a project of building my own personal gateway using Ubuntu 18.04 LTS, discovered Webmin and Virtualmin, and gained a little bit of confidence. Moreover, my trial period of G Suit email management had run out, so that added an additional $5/month expense, and I knew most free web hosting services are crappy and don’t really offer a reliable mail system, all these made me ready for a change. So, I rented the lowest tier VPS from Vultr, and set about an adventure (trust me, unless you host some kind of a video streaming service, 500 GB is enough bandwidth for us regular Joe’s websites).
1. Get a VPS: The first thing you would need is a VPS. I recommend Vultr (simply because I trust them more), they are pretty cheap, although you might want to get a tier that offers IPv4 as well (IPv6 comes free with a server with IPv4 address), and they keep your IP fixed if you don’t delete your server. Make sure the VPS provider you choose gives you root access to your own VPS (it should be obvious, but you’d be surprised).
2. Install Linux: Install your favorite flavor of Linux, but make sure it is supported by Virtualmin, we are going to use that for easy domain and virtual server management.
3. Get a domain: Get a domain! My favorite registrar is Namecheap, they have free WhoisGuard, free advanced DNS management, free DNSSEC key management, etc. You can obviously try any other registrar, but I strongly recommend Namecheap. Let’s assume you bought the domain: domain.tld.
4. Fix glue records: Now that you have a VPS whose IP addresses you know, and a domain you own, you can start pointing your resources to each other. I would recommend using your own domain, go to advanced DNS management with your registrar, and add custom DNS servers. In Namecheap, it’s under: Domain -> Advanced DNS -> Personal DNS Servers. Use any convenient subdomain: e.g. ns1.domain.tld and ns2.domain.tld. You would put the IP addresses of your VPS as the records under ns1.domain.tld and ns2.domain.tld.
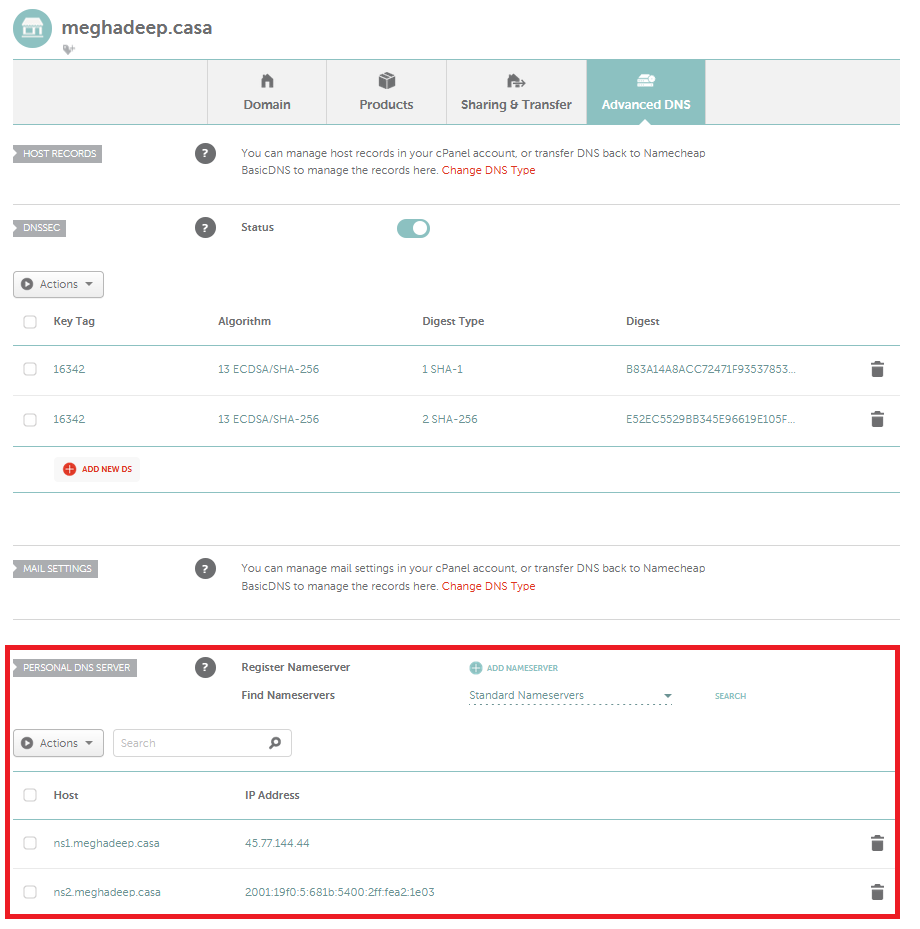
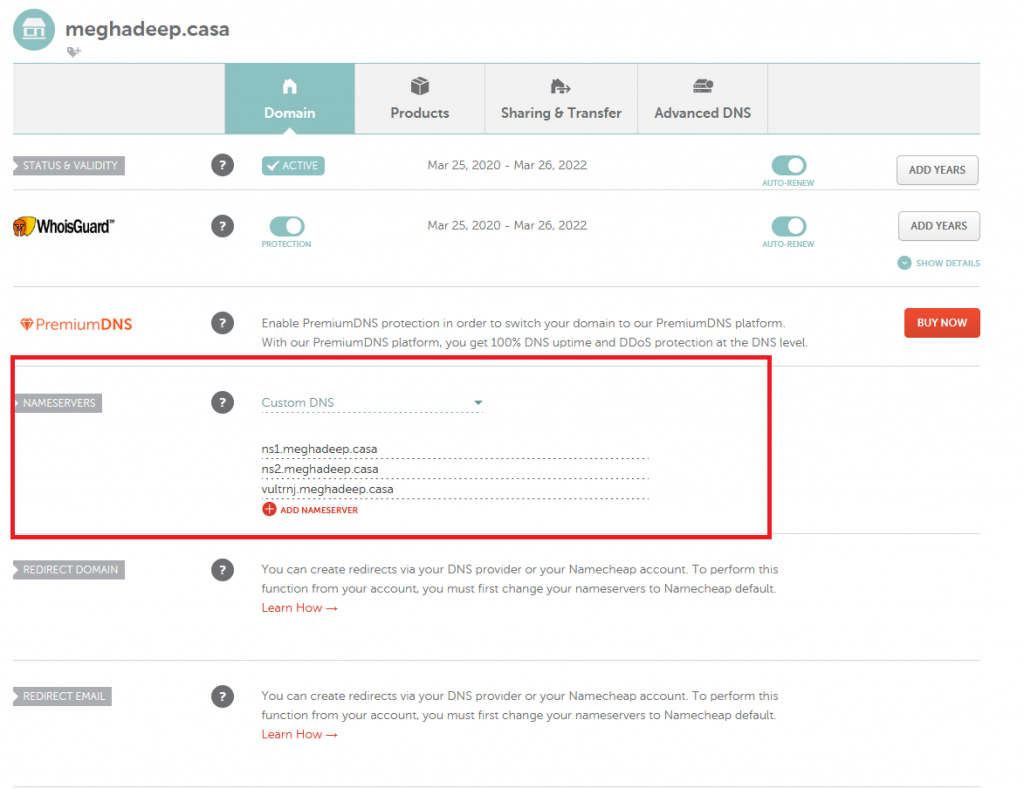
After you point ns1.domain.tld and ns2.domain.tld to the IP addresses of your VPS, it’s time to add nameserver records to your domain. By default, your registrar would use their own nameservers for your domain. In Namecheap, go to Domain -> Nameservers. Choose Custom DNS and put ns1.domain.tld, and ns2.domain.tld (because now your domain’s parent zone will have these IP records, you just added them).
5. Install and Configure Virtualmin: Finally it’s time to install Virtualmin! They make it easy:
user@vps:~$ sudo su
root@vps:/home/user# wget http://software.virtualmin.com/gpl/scripts/install.sh
root@vps:/home/user# /bin/sh install.sh
You can have your VPS with a fully qualified domain name (e.g. vps.domain.tld) as its hostname. Choose Primary Nameserver to be ns1.domain.tld (the custom DNS server you defined with your registrar), and 127.0.0.1 as the secondary nameserver. Rest of the configuration process should be self-explanatory. And there you go! You are all set.
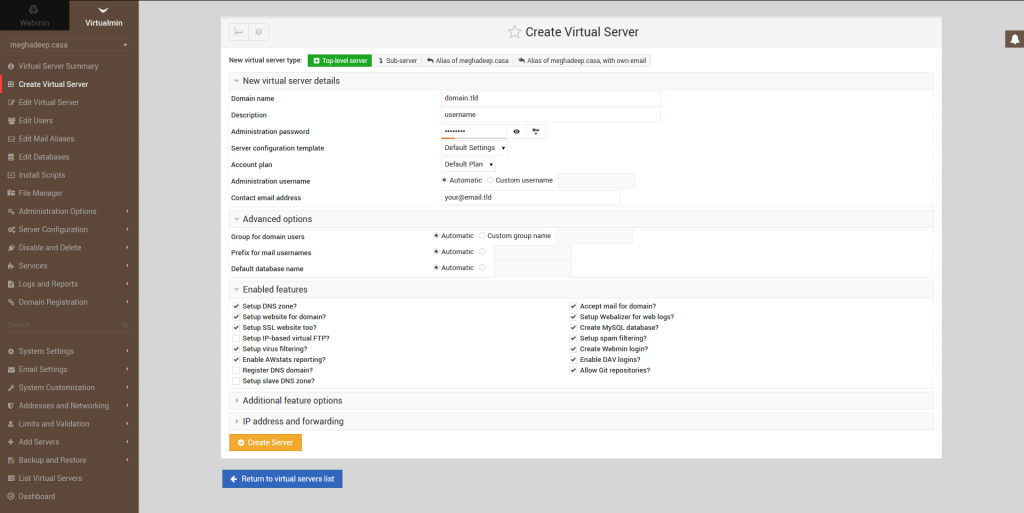
6. Create a new Virtual Server: Now that you have successfully configured Virtualmin, create a new server. Keep the domain name to domain.tld. In Enabled Features, you should check Setup SSL Website Too, and uncheck Create Slave DNS Zone (unless you know what you’re doing). Virtualmin makes it easy to request SSL certificates from Let’s Encrypt. Let’s Encrypt’s certificates are trusted in most modern browsers.
(highly recommended) 7. Add DNSSEC records: Login to your Webmin instance. Go to Servers -> BIND DNS Server. Choose your domain: domain.tld. Go to Setup DNSSEC Keys.
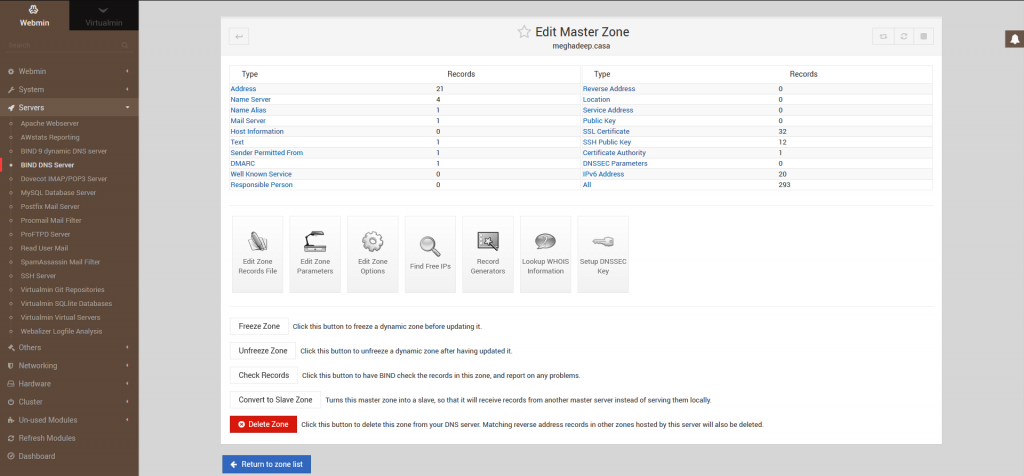
Choose your preferred encryption (Cloudflare and I recommend algorithm 13, ECDSA), and Bind9 will create and sign your zones with private and public key pairs. Keep your private keys hidden, your public keys are what you need to publish with your registrar.
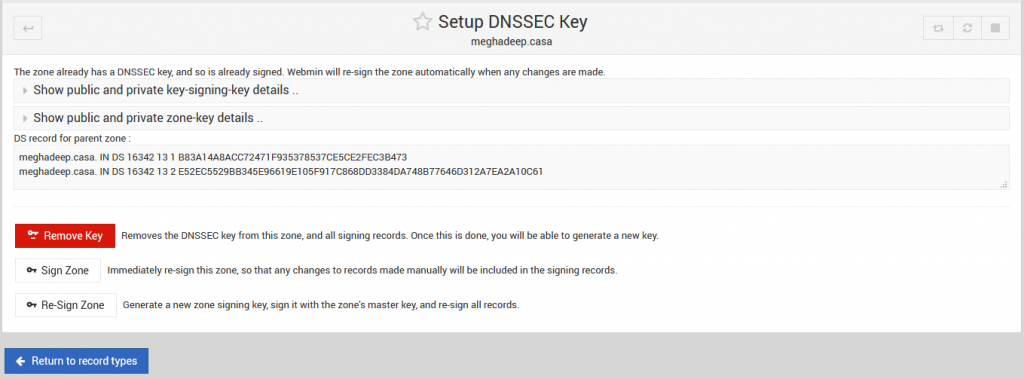
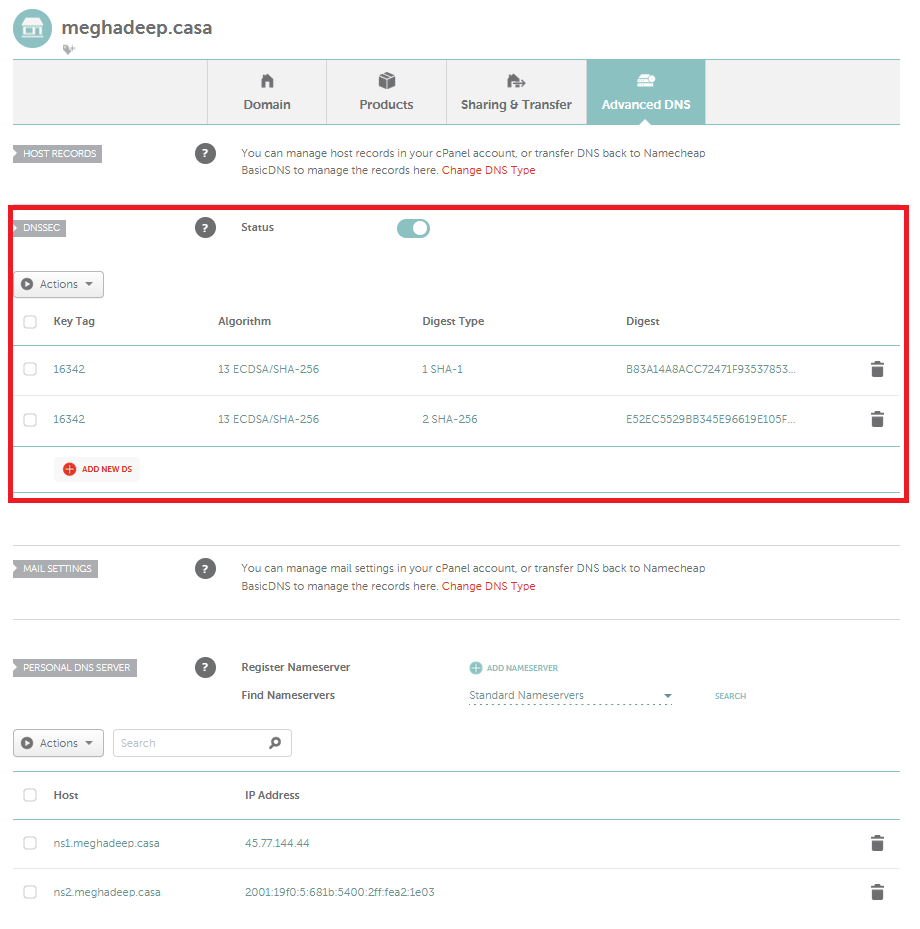
In Namecheap, go to Advanced DNS -> DNSSEC -> Choose your algorithm and enter the proper values. And voila, you have more secure DNS records than most other web host providers.
After you add your DS records in the parent zone with your registrar, check out the chain-of-trust of your keys using:
dnsviz.net
This will help you debug any DNS problems you might face while setting up your server. Their nice connection diagrams help a lot in understanding how DNS information is propagated.
(optional) 8. Install Scripts: Login to your Virtualmin instance. Choose your Virtual Server: domain.tld. Go to Install Scripts. You can install any available scripts you see there. If you want a simple website with widely available community support, install WordPress; it’s free. If you do choose to install WordPress, don’t keep it under a subfolder (or be sure to be able to edit your .htaccess file accordingly). You can install Roundcube (now install THIS under a subfolder so that you can go to domain.tld/roundcube) to access your emails.
There you go! You can now host your website in your own VPS! You have complete control over all your subdomains, and you can add as many new websites by creating sub servers (with addresses sub.domain.tld, sub2.domain.tld etc.) at the cost of one single domain purchase with your registrar. You can create multiple Virtual Servers with different domain names, set up your own DDNS server for your home network, the sky is your limit (or not)!
