

When I went from being an occasional Linux user to an exclusive Linux user about seven years ago, I knew there would be times I’d miss the simplicity of having a one-click solution to a lot of things that came with Windows (albeit, at a steep price of being spied on by your own machine). Over the years, I have tinkered with a few Linux machines, and have been missing those solutions less and less, but in these seven years, I have not had to deal with creating a hotspot on my laptop. Recently, I went to a hotel that had a smart TV, but had casting turned off at the router level (the mDNS port was blocked). The Wi-Fi signal itself was very weak too at one part of the room. I thought I’d set up a hotspot using my laptop, that way I would get stable Wi-Fi signal for my phone, and would be able to cast videos on the TV. As luck would have it, it turned out to be quite complicated in the distro I use as my daily driver, and had to give up trying to figure it out during my stay.
I use Fedora Kinoite as my daily driver; it’s one of the new style of “immutable” distros (although we’ve graduated from that term these days, and prefer to use the term “atomic” distros). Other than all the good things that came with immutable, or atomic distros, it meant that I could not use the fantastic tool called linux-wifi-hotspot. Seriously, if you have any regular distros like Ubuntu, Debian, regular Fedora Workstation, etc. use that fantastic tool; you can still use this guide, but it’ll be more complicated for you than it needs to.
Disclaimer: Being a Mechanical Engineer by degree and a Market Analyst by profession, everything I know about computers is a weird mixture of trial-and-error, common sense, Reddit, and StackExchange. So, needless to say, proceed at your own risk.
The first question we need to ask is whether we want a bridged hotspot, or a NATed hotspot. Bridged hotspot is easier to set up, but we lack finer controls over our network (like enabling mDNS for Google Cast, or AirPlay). NATed hotspot may be slightly more complicated to set up, but it comes with a whole lot of creature comforts like improved security, finer network controls, etc. For this blog post, let’s assume we want to set up a NATed hotspot.
First thing we need to do is confirm that our Wi-Fi card (the physical device that allows us to use our router’s Wi-Fi) allows AP mode, and simultaneous operation as a client and an AP. If you are using Fedora Atomic Desktops in a previously Windows laptop, chances are your Wi-Fi card supports both. If it doesn’t support simultaneous operation, we won’t be able to use an existing Wi-Fi connection as our internet connection, and run a hotspot along with it; however, we’d still be able to use some other mode of internet connection (e.g. ethernet, another USB Wi-Fi card, etc.), and run a Wi-Fi hotspot. If our Wi-Fi card does not support AP mode, then we’d need to buy a USB Wi-Fi card that does. To confirm these, run the following command on your terminal (copy the entire command after the $ sign, paste it in terminal, and hit enter):
~]$ iw list
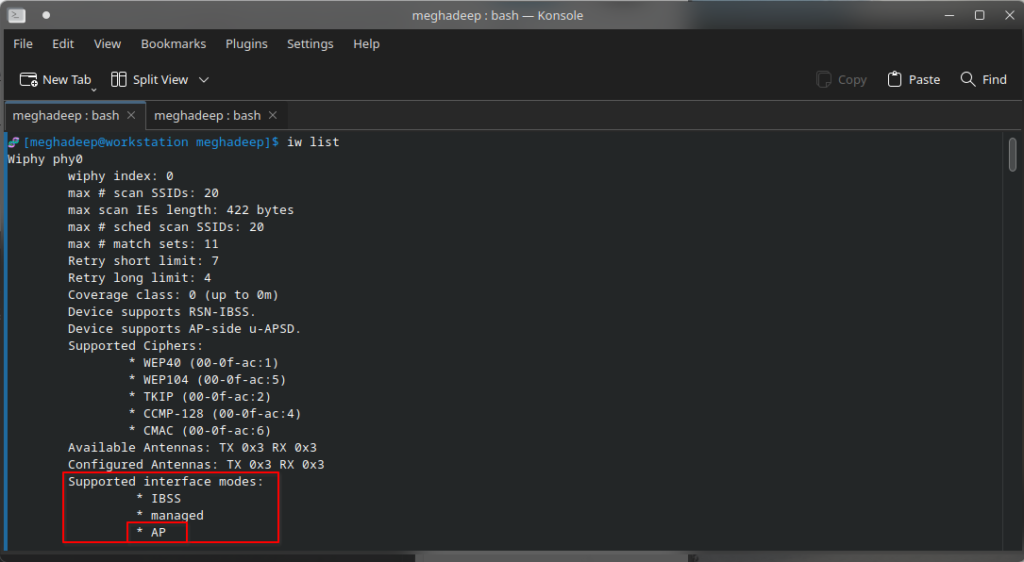
As long as we see “AP” under the Supported interface modes, we can be sure that our Wi-Fi card supports AP mode.
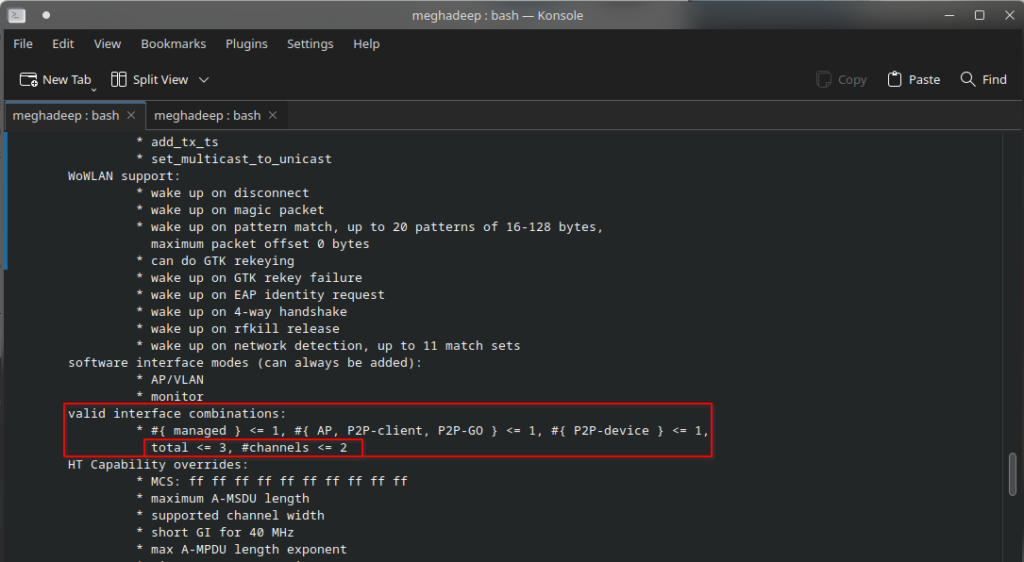
Scroll down, and search for valid interface combinations. As long as we have the total more than 1, we can be sure that our Wi-Fi card supports simultaneous operation. Bonus if we see the number of channels to be more than 1 as well (which would allow us to choose different Wi-Fi channels during simultaneous operation)!
We’d then need to confirm if we have IP forwarding enabled. To do that, run the following command on your terminal:
~]$ sudo sysctl -a | grep forward
Check if you get these results:
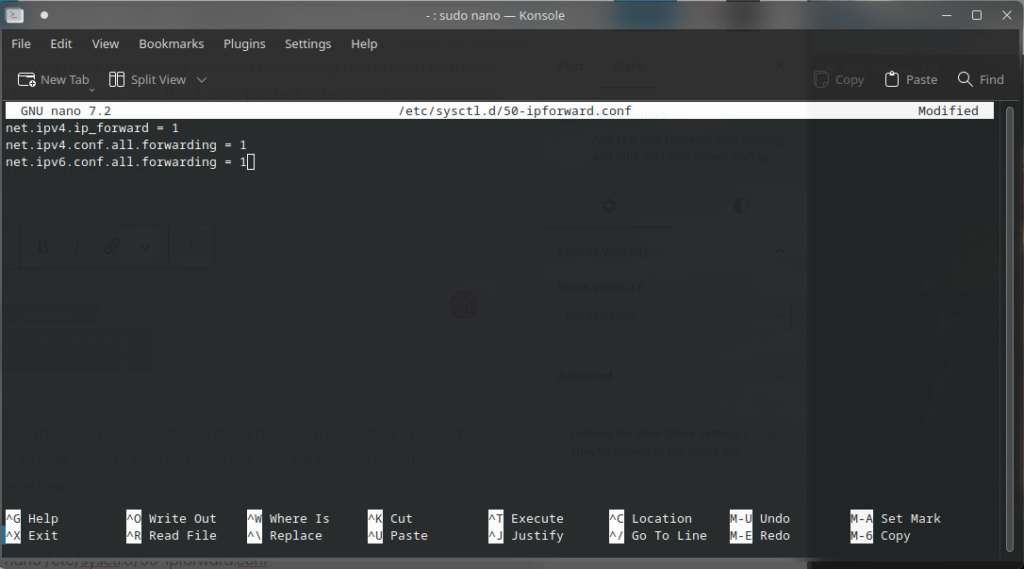
net.ipv4.ip_forward = 1
net.ipv4.conf.all.forwarding = 1
net.ipv6.conf.all.forwarding = 1
If you don’t see these in your result, you don’t have IP forwarding enabled. But, don’t worry, it’s quite easy to set up. Create a new file in /etc/sysctl.d/ directory, and write those there:
~]$ sudo nano /etc/sysctl.d/50-ipforward.conf
Hit CTRL+X to save and exit. Then run the following command for it to take effect immediately.
~]$ sudo sysctl -p
Now that you have IP forwarding set up, it’s time to configure the firewall.
You can check if firewalld (the default firewall in Fedora) is active by running the following command in terminal. By default, it should be running.
~]$ sudo firewall-cmd --state
In case it is not running, or you get an error, run the following command in terminal:
~]$ sudo systemctl restart firewalld
Once you confirm your firewall is active, get the default zone by running the following command in terminal:
~]$ sudo firewall-cmd --list-all-zones | grep "(default, active)"
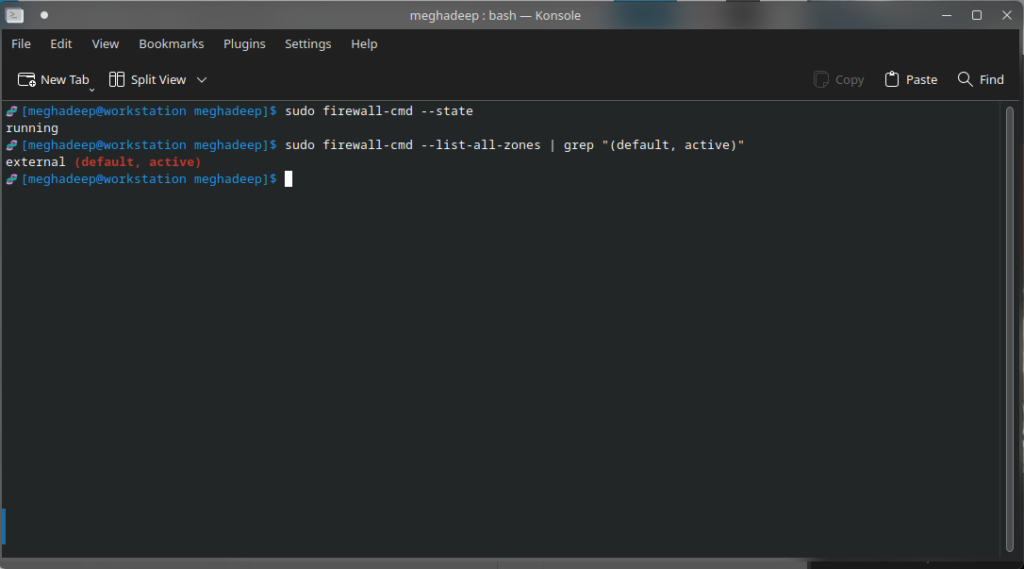
Since I changed my default zone to “external”, that’s what it shows me. You may get “public”, or “FedoraWorkstation” as your default zone. Either of those are fine, you’d just need to add “masquerading”. This allows your laptop to be used a NAT (Network Address Translation), which is how we are setting up our hotspot.
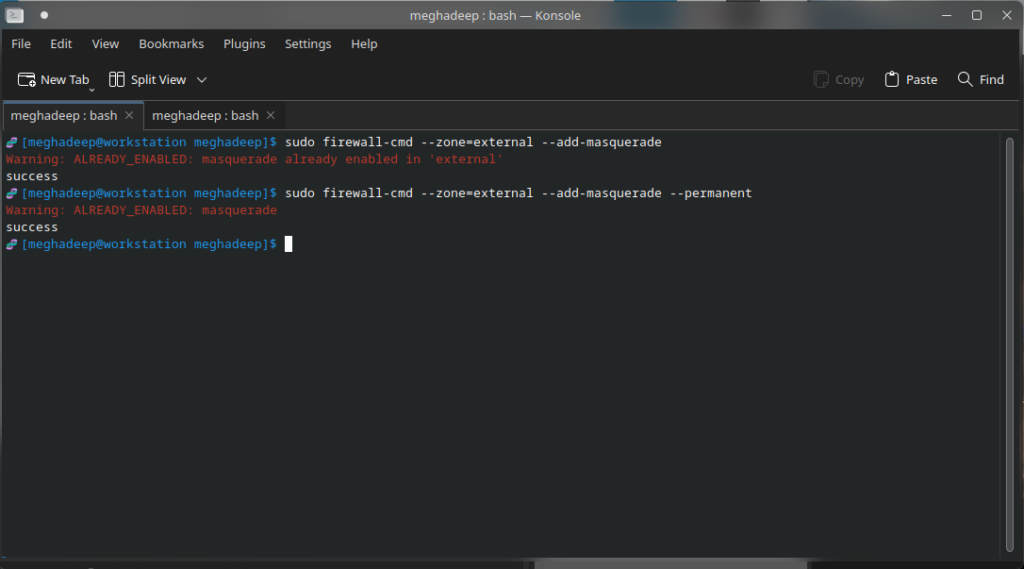
Run the following command on your terminal:
~]$ sudo firewall-cmd --zone=<YOUR-DEFAULT-ZONE> --add-masquerade
To make this change permanent, you’d also need to run:
~]$ sudo firewall-cmd --zone=<YOUR-DEFAULT-ZONE> --add-masquerade --permanent
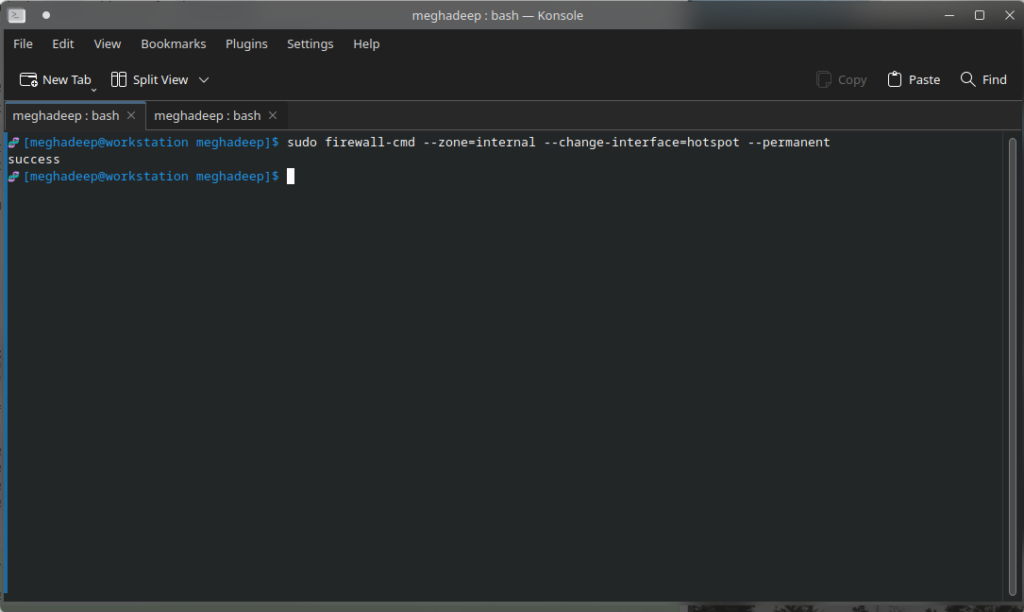
Now, if our Wi-Fi card supports simultaneous operation of AP mode and client mode, we’d need to set up a virtual interface so that we can use an existing Wi-Fi connection as our internet connection while simultaneously providing a Wi-Fi hotspot. Let’s call that virtual interface “hotspot” to simplify things. We’d need to add this virtual interface to the internal zone of our firewall (if your Wi-Fi card does not support simultaneous operation, replace “hotspot” with the interface you want to use, run “ip link show” in terminal to get the name of your interface). To do that, run the following command in the terminal:
~]$ sudo firewall-cmd --zone=internal --change-interface=hotspot --permanent
Now, we’d need to make a new firewall policy to allow data from the internal zone to the outside internet, and valid existing connections from the internet to our internal zone. We’d also need to make sure we allow DNS queries, and DHCP queries in the internal zone. Run the following commands in the terminal:
~]$ sudo firewall-cmd --permanent --new-policy int2ext
~]$ sudo firewall-cmd --permanent --policy int2ext --add-ingress-zone internal
~]$ sudo firewall-cmd --permanent --policy int2ext --add-egress-zone <YOUR-DEFAULT-ZONE>
~]$ sudo firewall-cmd --permanent --policy int2ext --set-target ACCEPT
~]$ sudo firewall-cmd --permanent --zone=internal --add-service=dns
~]$ sudo firewall-cmd --permanent --zone=internal --add-service=mdns
~]$ sudo firewall-cmd --permanent --zone=internal --add-service=dhcp
~]$ sudo firewall-cmd --permanent --zone=internal --add-service=dhcpv6-client
~]$ sudo firewall-cmd --reload
At this point, we want to make sure we have all the dependencies installed. We’ll use a program called “hostapd” to manage the hotspot itself, and “dnsmasq” to manage the clients that connect to your hotspot. In Fedora Atomic Desktops, we can do that by running:
~]$ sudo rpm-ostree install hostapd dnsmasq --apply-live
After those are installed, you’d need to configure them. Run the following command on your terminal to edit the hostapd.conf file:
~]$ sudo mv /etc/hostapd/hostapd.conf /etc/hostapd/hostapd.conf.bak
~]$ sudo nano /etc/hostapd/hostapd.conf
Following is my hostapd.conf file. For the most part, you can copy-paste this file, just make sure you edit the required parts:
#
# This will give you a minimal, secure wireless network.
#
# DO NOT BE SATISFIED WITH THAT!!!
#
# A complete, well commented example configuration file is
# available here:
#
#       /usr/share/doc/hostapd/hostapd.conf
#
# For more information, look here:
#
#       http://wireless.kernel.org/en/users/Documentation/hostapd
#

ctrl_interface=/var/run/hostapd
ctrl_interface_group=wheel

# Some usable default settings...
macaddr_acl=0
auth_algs=1
ignore_broadcast_ssid=0

# Uncomment these for base WPA2 support with a pre-shared key
wpa=2
wpa_key_mgmt=WPA-PSK
wpa_pairwise=TKIP
rsn_pairwise=CCMP

# DO NOT FORGET TO SET A WPA PASSPHRASE!!
wpa_passphrase=<MY-SUPER-SECURE-HOTSPOT-PASSWORD>

# Most modern wireless drivers in the kernel need driver=nl80211
driver=nl80211

# Customize these for your local configuration...
# Change the interface if you are enabling your hotspot in some other
# network interface (like a USB card)
interface=hotspot
# This will start the hotspot in 2.4GHz mode
hw_mode=g
channel=7
ieee80211n=1
# Change your hotspot name
ssid=<MY-HOTSPOT-NAME>
# Enables QoS (Quality of Service)
wmm_enabled=1
Hit CTRL+X to save and exit. We’d now configure dnsmasq. Dnsmasq is responsible for managing the clients that connect to your hotspot by providing them with dynamic local IPs, and a lightweight DNS server.
~]$ sudo mv /etc/dnsmasq.conf /etc/dnsmasq.conf.bak
~]$ sudo nano /etc/dnsmasq.conf
Following is my dnsmasq config file. You can copy-paste this for a quick easy configuration. You shouldn’t need to change anything, but do go through the comments to understand what’s happening behind the scenes.
# If you want dnsmasq to change uid and gid to something other
# than the default, edit the following lines.
user=dnsmasq
group=dnsmasq

# If you want dnsmasq to listen for DHCP and DNS requests only on
# specified interfaces (and the loopback) give the name of the
# interface (eg eth0) here.
# Repeat the line for more than one interface.
interface=hotspot

# Serve DNS and DHCP only to networks directly connected to this machine.
# Any interface= line will override it.
#local-service
# Accept queries in default configuration only from localhost
# Comment out following option or explicitly configure interfaces or
# listen-address
local-service=host

# To listen only on localhost and do not receive packets on other
# interfaces, bind only to lo device. Comment out to bind on single
# wildcard socket.
#bind-interfaces
# Comment out above line and uncoment following 2 lines.
# Update interface name, use ip link to get its name.
bind-dynamic
interface=hotspot

# Uncomment this to enable the integrated DHCP server, you need
# to supply the range of addresses available for lease and optionally
# a lease time. If you have more than one network, you will need to
# repeat this for each network on which you want to supply DHCP
# service.
dhcp-range=192.168.253.50,192.168.253.150,12h

# Set the DHCP server to authoritative mode. In this mode it will barge in
# and take over the lease for any client which broadcasts on the network,
# whether it has a record of the lease or not. This avoids long timeouts
# when a machine wakes up on a new network. DO NOT enable this if there's
# the slightest chance that you might end up accidentally configuring a DHCP
# server for your campus/company accidentally. The ISC server uses
# the same option, and this URL provides more information:
# http://www.isc.org/files/auth.html
dhcp-authoritative

# Include all files in /etc/dnsmasq.d except RPM backup files
conf-dir=/etc/dnsmasq.d,.rpmnew,.rpmsave,.rpmorig
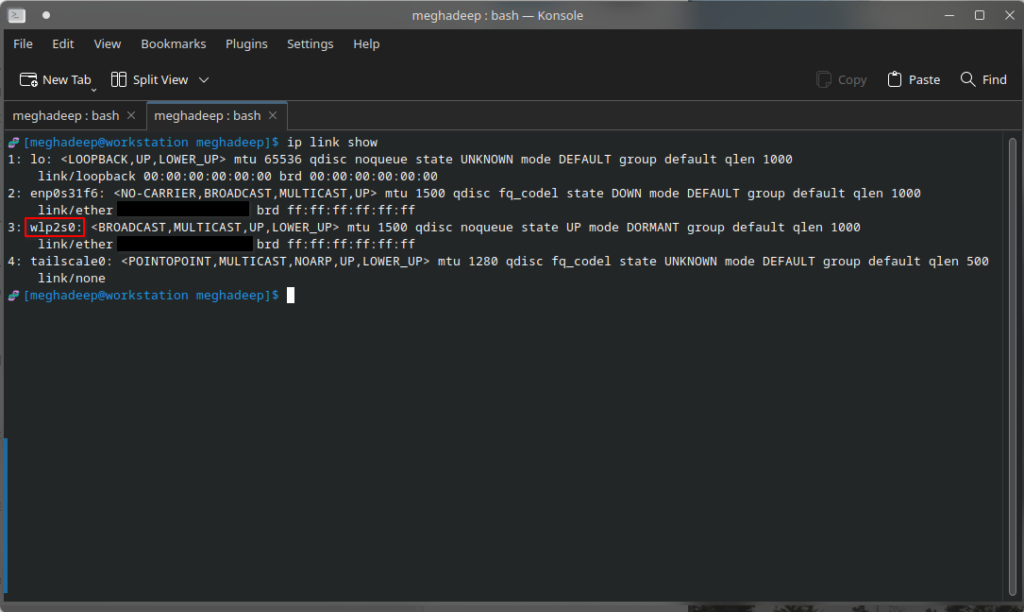
Hit CTRL+X to save and exit. The hard part is almost over! We’ll just need few more files, and we’ll be on our way to start the hotspot! We’ll need to find the device name of our existing Wi-Fi card where we will add the virtual interface. To do that, run the following command in the terminal:
~]$ ip link show
Your Wi-Fi card should have a name that starts with w. For me, it is wlp2s0:
At this point, we’re getting ready to make the final changes. Create a new directory in your /opt directory that’ll host the hotspot start and stop scripts.
~]$ sudo mkdir /opt/hotspot
We’ll now add the hotspot startup script here.
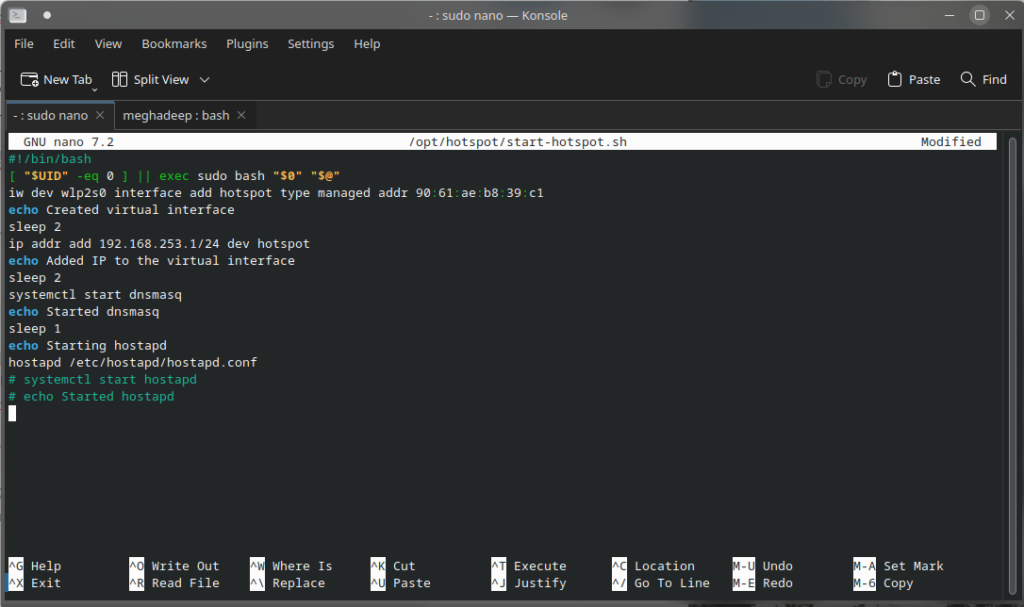
~]$ sudo nano /opt/hotspot/start-hotspot.sh
Copy-paste the following in the text editor. Make sure to change the required fields.
#!/bin/bash
[ "$UID" -eq 0 ] || exec sudo bash "$0" "$@"
# CHANGE YOUR WI-FI CARD NAME or delete if you are using a USB WiFI card
iw dev <YOUR-WIFI-CARD-NAME> interface add hotspot type managed addr 90:61:ae:b8:39:c1
echo Created virtual interface
sleep 2
# If you are using a USB card, change hotspot to your USB device name
ip addr add 192.168.253.1/24 dev hotspot
echo Added IP to the virtual interface
sleep 2
systemctl start dnsmasq
echo Started dnsmasq
sleep 1
echo Starting hostapd
hostapd /etc/hostapd/hostapd.conf
Hit CTRL+X to save and exit. We’ll then add the hotspot stop script:
~]$ sudo nano /opt/hotspot/stop-hotspot.sh
Copy paste the following:
#!/bin/bash
[ "$UID" -eq 0 ] || exec sudo bash "$0" "$@"
pkill hostapd
echo Stopped hostapd service
sleep 1
pkill dnsmasq
echo Stopped dnsmasq
sleep 1
# If you are using a USB card, change hotspot to your USB device name
ip address del 192.168.253.1/24 dev hotspot
# Delete the line if you are using a USB card
iw dev hotspot del
echo Deleted virtual interface
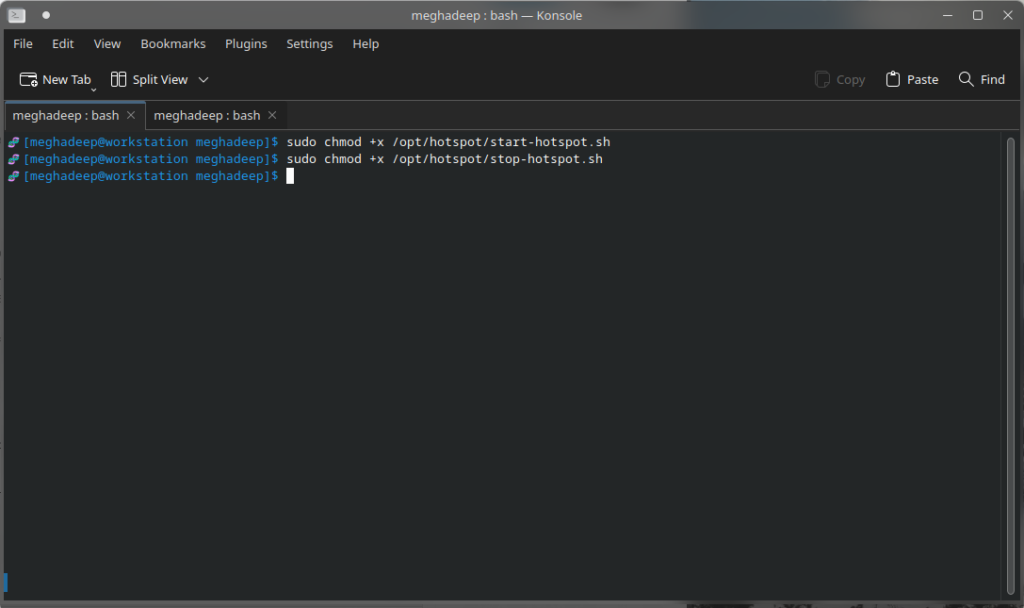
Hit CTRL+X to save and exit. We’ll now make these two files executable by changing the file permissions. Run the following commands in terminal:
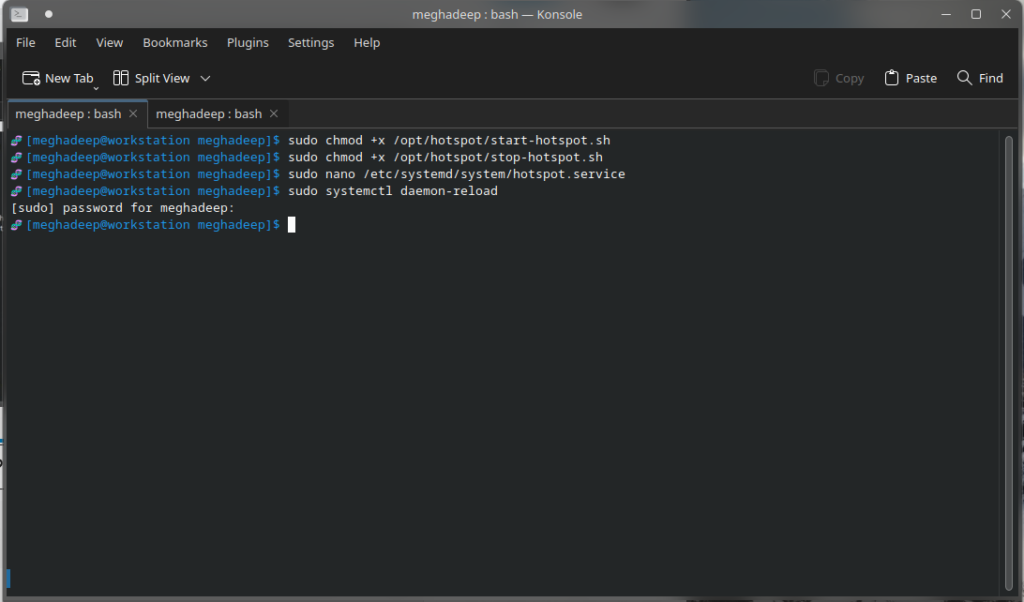
~]$ sudo chmod +x /opt/hotspot/start-hotspot.sh
~]$ sudo chmod +x /opt/hotspot/stop-hotspot.sh
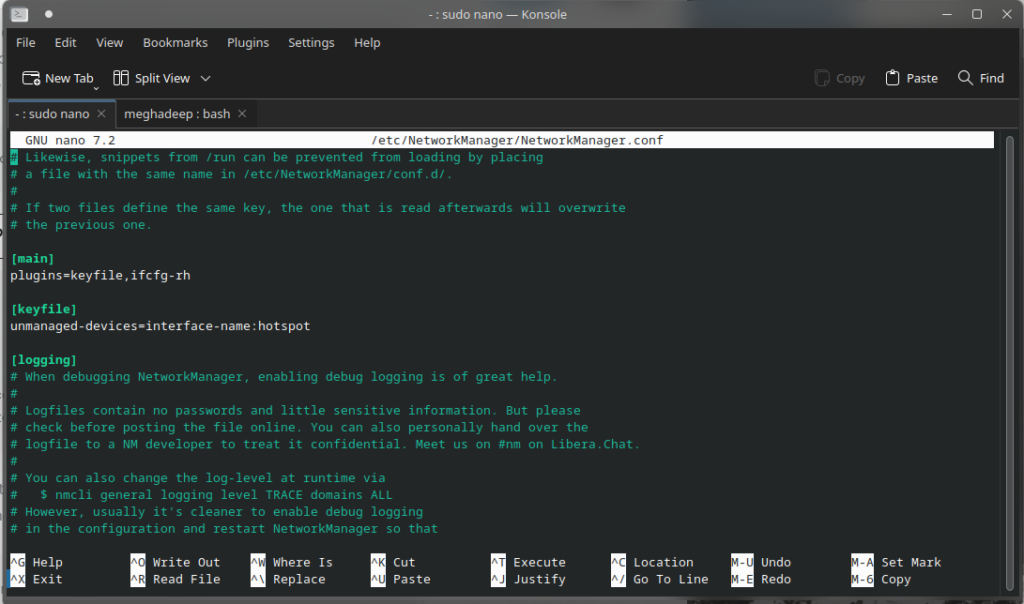
We’ll now need to tell our NetworkManager that we do not want it to manage our hotspot interface. We can do that by editing the NetworkManager.conf file. We can do that by running the following command in terminal:
~]$ sudo nano /etc/NetworkManager/NetworkManager.conf
Make sure that file contains the following:
[main]
plugins=keyfile,ifcfg-rh

[keyfile]
# If you are using a USB card, change hotspot to your USB device name
unmanaged-devices=interface-name:hotspot
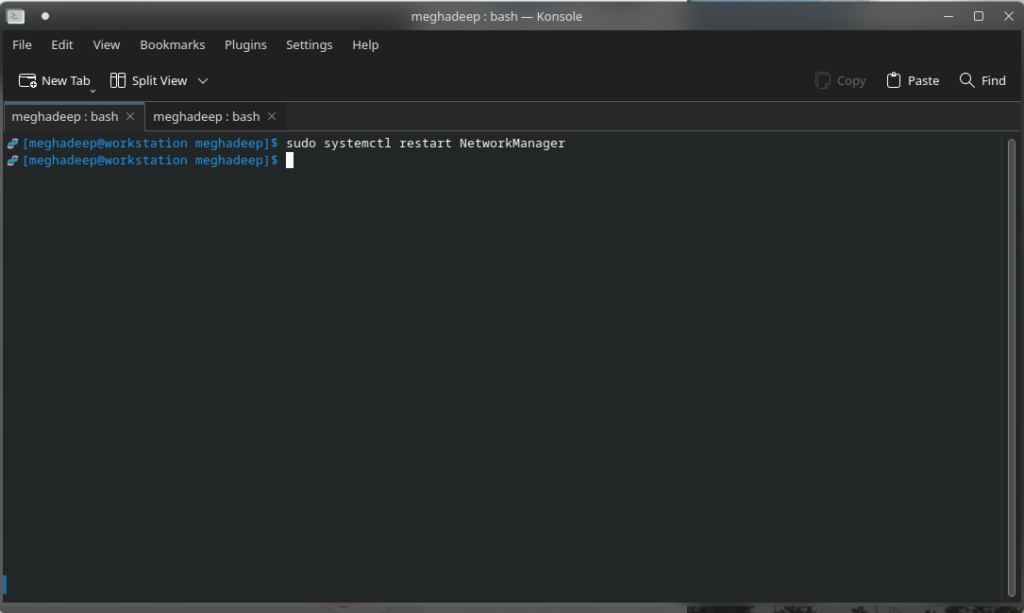
Now run the following command in terminal to reload the NetworkManager configuration:
~]$ sudo systemctl restart NetworkManager
We’ll now make a systemctl service to make things super easy to start and stop. Run the following command in terminal:
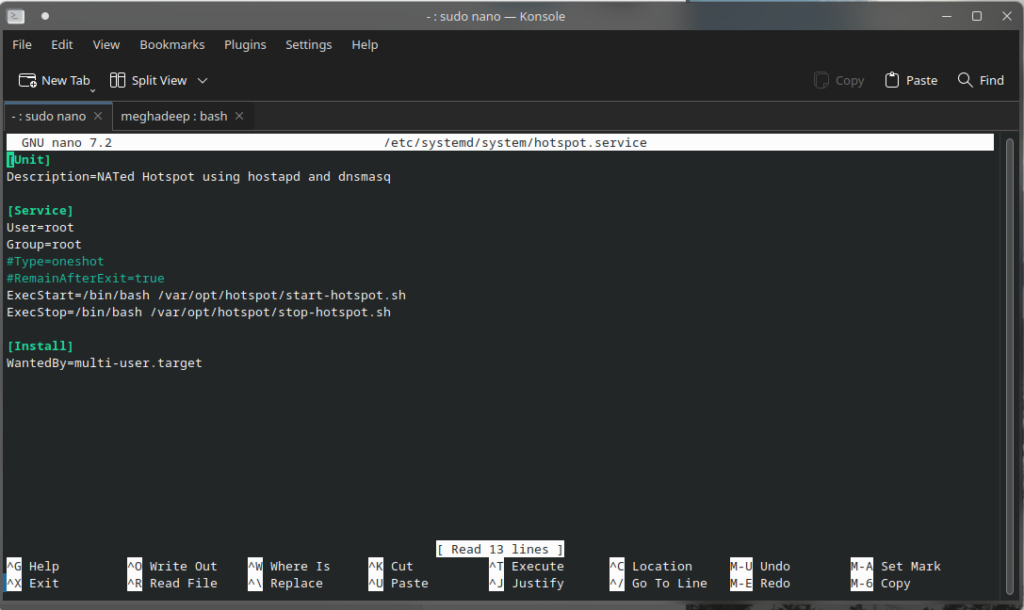
~]$ sudo nano /etc/systemd/system/hotspot.service
Copy-paste the following in the text editor:
[Unit]
Description=NATed Hotspot using hostapd and dnsmasq

[Service]
User=root
Group=root
ExecStart=/bin/bash /var/opt/hotspot/start-hotspot.sh
ExecStop=/bin/bash /var/opt/hotspot/stop-hotspot.sh

[Install]
WantedBy=multi-user.target
Run the following command for systemctl to refresh existing services:
~]$ sudo systemctl daemon-reload
And you are done! You can easily start the hotspot by running
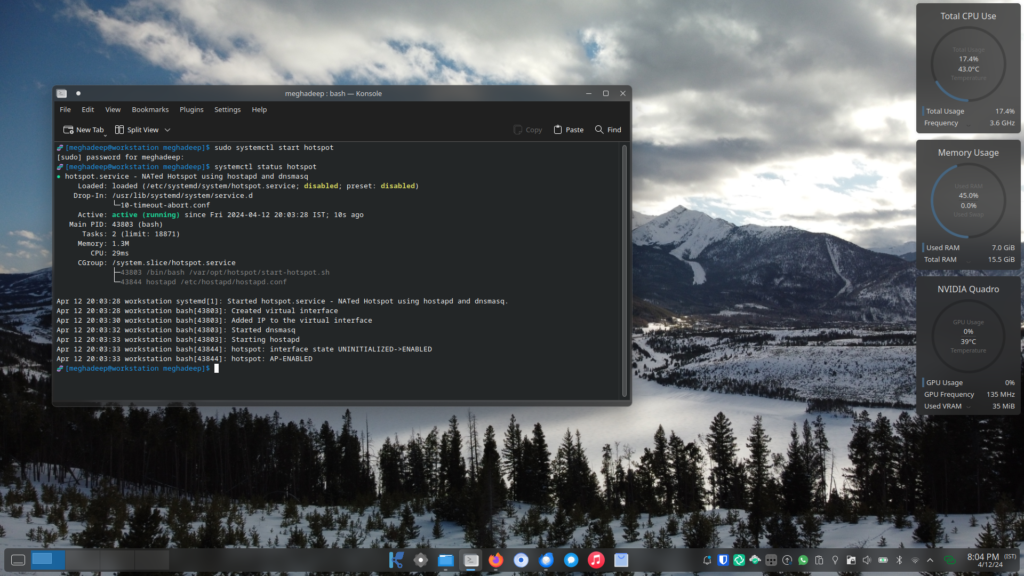
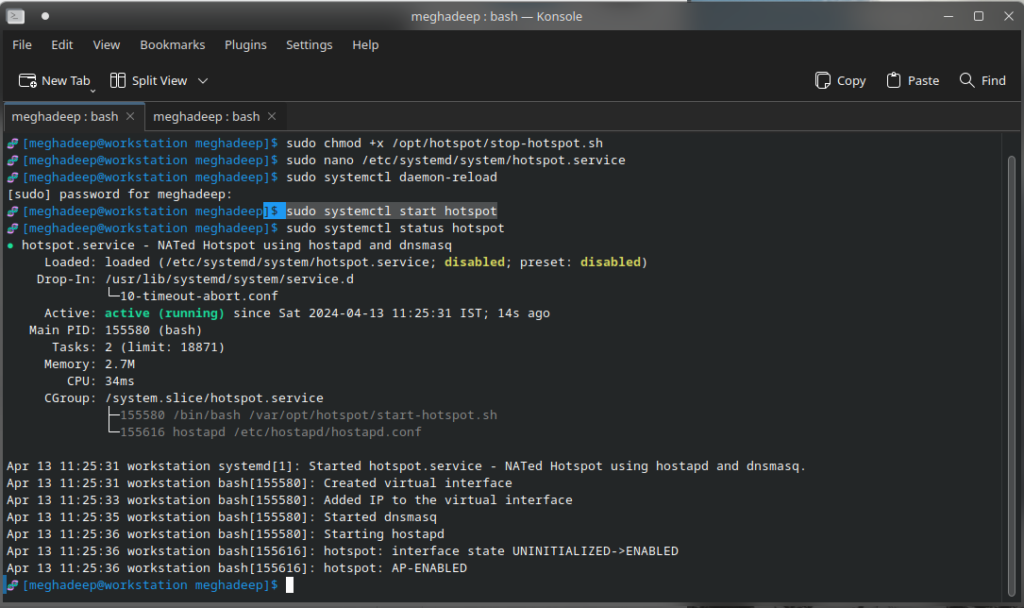
~]$ sudo systemctl start hotspot
You can check the status by running:
~]$ sudo systemctl status hotspot
To stop the hotspot, simply run:
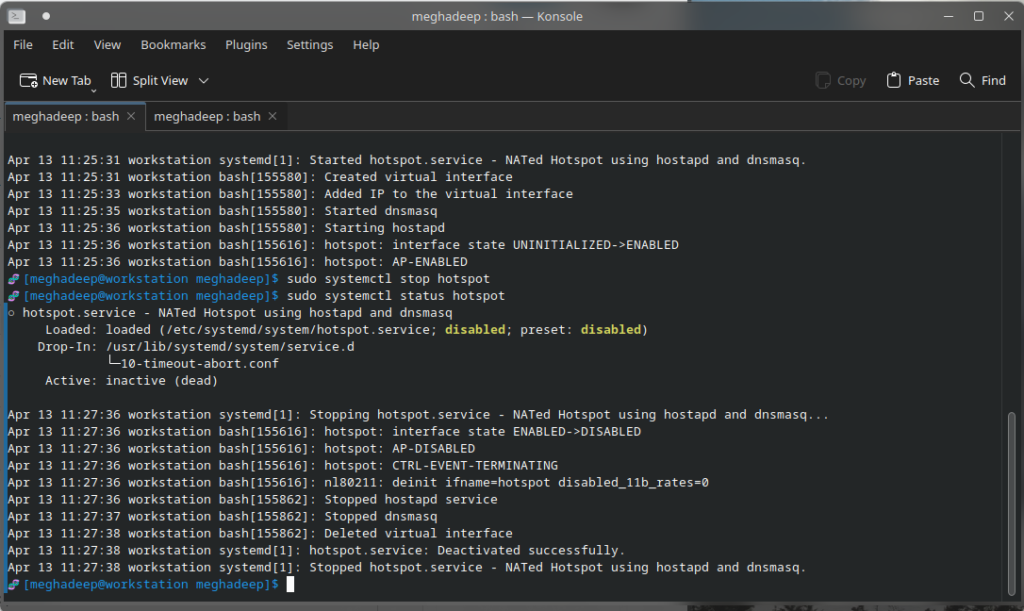
~]$ sudo systemctl stop hotspot
You can check the status by running:
~]$ sudo systemctl status hotspot
We are done, but it still isn’t quite as good as a one-click solution. Who wants to write a terminal command every time we need to start or stop the hotspot? Well, if you are running Fedora Kinoite, there’s a solution for that too!
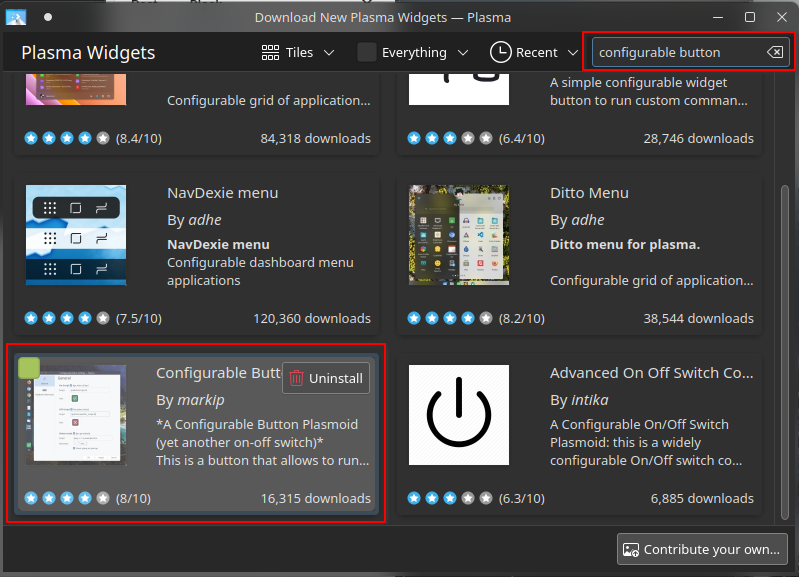
In KDE, we can install a Plasma applet called configurable button. You can install this by right clicking on the desktop, clicking on Add Widget, and then following Get New Widget -> Download New Plasma Widgets. Search for Configurable Button.
Add this new widget anywhere you want to keep the Hotspot button, and then configure it like following:
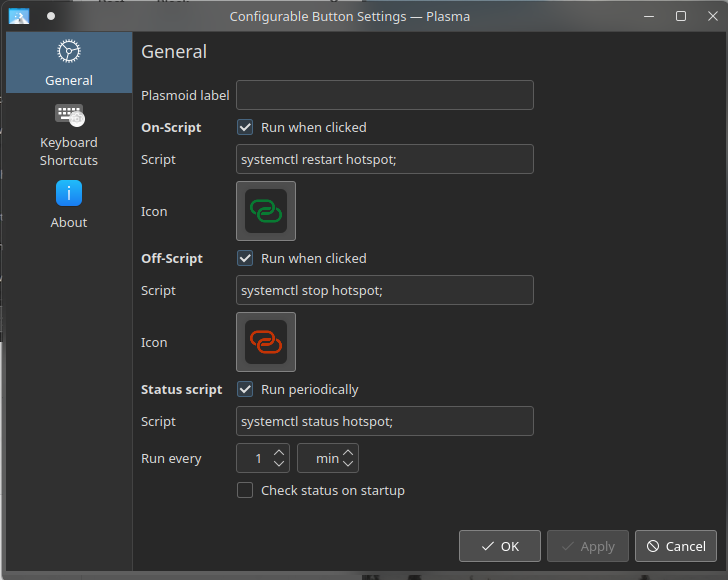
And now you have a one-click solution to start and stop your hotspot in your Fedora Atomic Distro!
Huge thanks to the following contributors without whom I wouldn’t have been able to do this:
